
Update / 9 August 2020:
I present you a Youtube video tutorial as well.
A couple of months back, I had to make an iOS application at work, where the user video is captured while he/she reads out a script. At the end of the video recording, user could enter his/her email address to receive the video.
While, all this sounds simple, my company requirements were not. Company terms dictated that we start a video with opener, burn company logo and sample stock market feed ticker, end with closer. Merge the assets in the application, upload to a cloud service and send out email to the user with link to download video.
Taking down requirements, I was thinking this will not a simple task. I knew I had to use AVFoundation as the default video capture solution provided with UIImagePickerController was insufficient.
Read more about UIImagePickerController here.
I was stuck initially as I could not find much information. All training materials / articles I could find was either outdated or incomplete. I spent countless hours on StackOverflow and RayWenderlich with understanding concepts and re-writing code for my application.
I knew I had to document and provide a simplified solution to support other developers like me. I will be showing you how to create a similar application so you can learn true potential of AVFoundation beast.
This tutorial will be split in multiple parts and at the end you will enough power to create TikTok similar application.
Sections
- 1-Project Setup
- 2-Create Launch View Controller
- 3-Create Request Camera Authorization View
- 4-Embed Request Camera Authorization View
- 5-Create Request Camera Authorization Controller
- 6-Request Camera Authorization
- 7-Add Camera Authorization Message
- 8-Source Code
1-Project Setup
Let us start by creating a Single View App in XCode.

And enter ProductName. For our application, we are going to name it BecomeAPresenter. Make sure you select Swift as Language and Storyboard as User Interface.

2-Create Launch View Controller
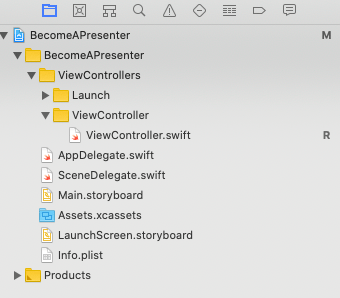
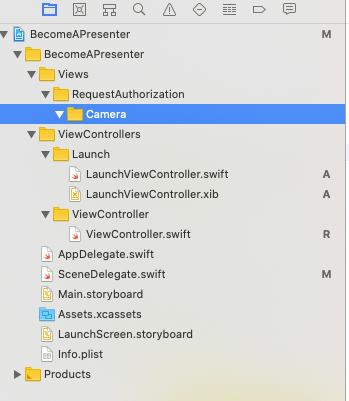
Lets us clean up some file structure by creating a Group called ViewControllers and also create two sub-groups, ViewController and Launch. Then move the default ViewController inside ViewController and forget about it as we will create LaunchViewController. You should have following group structure.
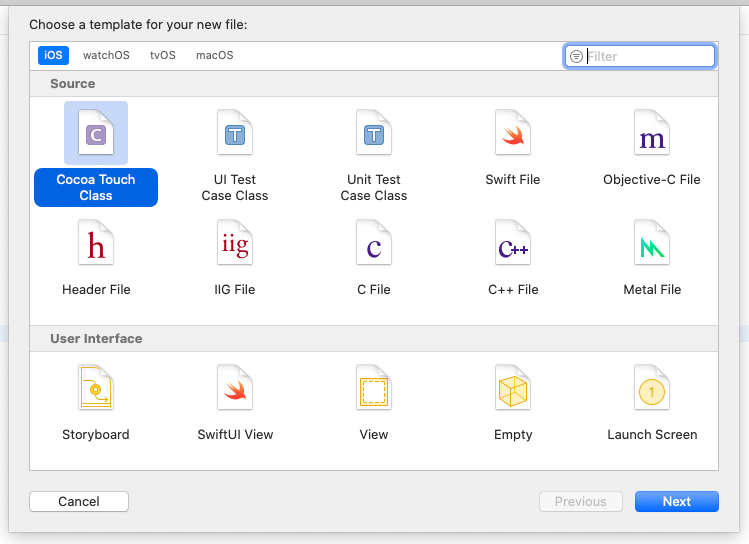
We will create LaunchViewController – subclass of UIViewController and also its Nib file. Select the Launch sub-group inside ViewControllers group and click on File – New File and select Cocoa Touch Class.
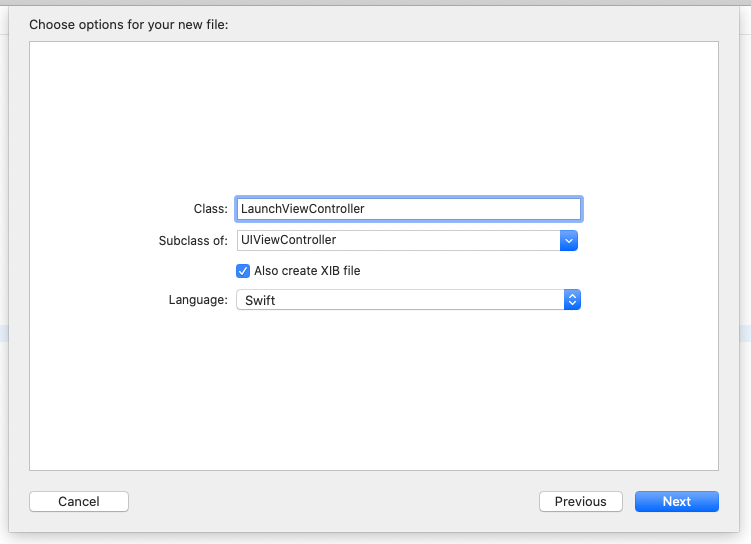
Click Next and enter UIViewController as subclass and provide LaunchViewController as name in Class. Make sure to select “Also create XIB file”
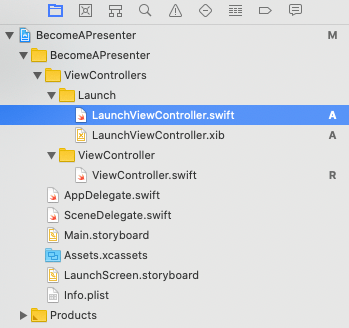
Click next and hit create button on next screen. You should see file created as such.
Note, we are not creating LaunchViewController inside Main Storyboard, rather a separate Nib. This is because dealing with Storyboards do not play nice with resolving conflicts in source control when working in teams. Hence, I always like to handle things safely and adapt good practices.
We need to setup LaunchViewController as our initial view controller that loads on app launch. To do this, head to SceneDelegate and enter following method inside willConnectTo method.
| // Youtube: https://www.youtube.com/watch?v=7AlZxClmhPw | |
| // Source: https://hashaam.com/2020/07/30/creating-camera-application-with-avfoundation/ | |
| func scene(_ scene: UIScene, willConnectTo session: UISceneSession, options connectionOptions: UIScene.ConnectionOptions) { | |
| guard let _ = (scene as? UIWindowScene) else { return } | |
| let nibName = String(describing: LaunchViewController.self) | |
| let bundle = Bundle.main | |
| let launchViewController = LaunchViewController(nibName: nibName, bundle: bundle) | |
| window?.rootViewController = launchViewController | |
| window?.makeKeyAndVisible() | |
| } |
We are using SceneDelegate as this is iOS 13 application. If you interested to target iOS earlier than 13, come back soon in a separate article as I will be explaining how to setup your view controller targeting versions prior to 13 also.
Let us make some change to test our LaunchViewController is loaded correctly. Open up LaunchViewController file and add following code to apply a different background color on the main view.
| // Youtube: https://www.youtube.com/watch?v=7AlZxClmhPw | |
| // Source: https://hashaam.com/2020/07/30/creating-camera-application-with-avfoundation/ | |
| override func viewDidLoad() { | |
| super.viewDidLoad() | |
| view.backgroundColor = .red | |
| } |
Let us build and run the application next.
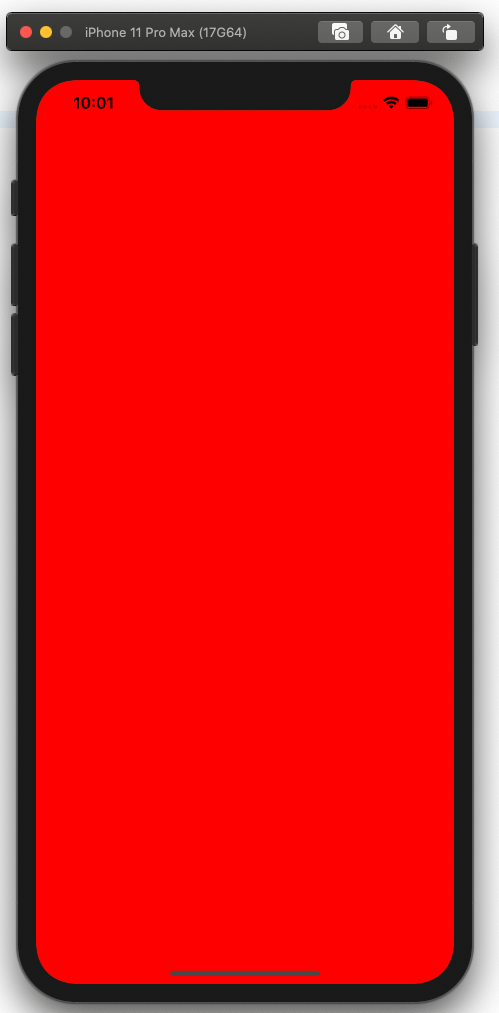
We can confirm that LaunchViewController was loaded successfully. Let us remove the code to set background color.
3-Create Request Camera Authorization View
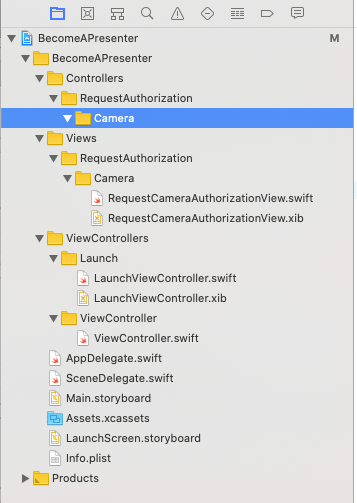
We will start with creating group to house our views. Create a group called Views and sub-group RequestAuthorization. Create another group inside RequestAuthorization called Camera. Lower image illustrates what structure we should have.
We will then create a new view by selecting Camera group and select File – New and select Cocoa Touch Class.
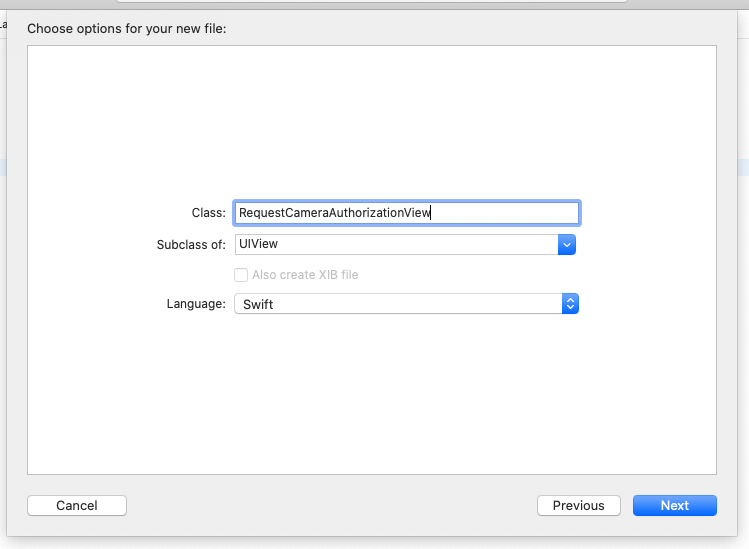
Click Next and UIView as subclass and enter RequestCameraAuthorizationView as class name.
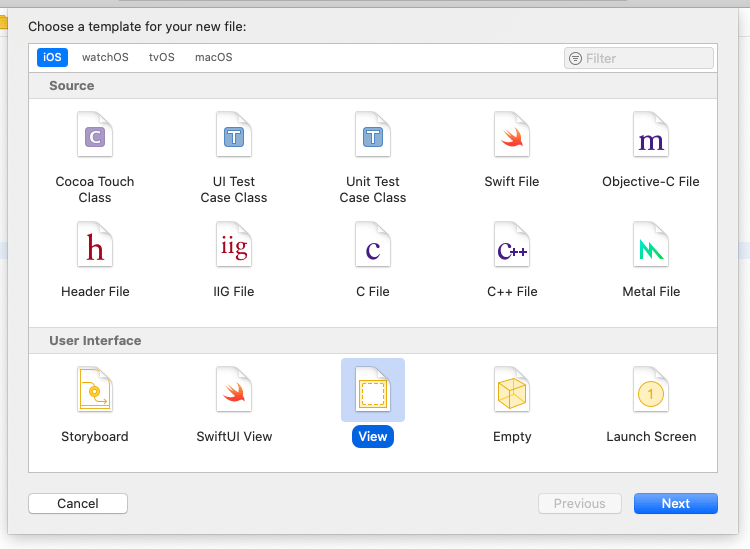
Click Next and Create in next screen. We will create Nib file next for the View. Select the Camera group one more time and Select File – New and select View.
And enter RequestCameraAuthorizationView as name of file and hit Create button. Open up swift file for the view and enter the following code
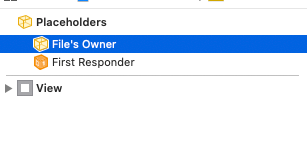
We will cover this setup more in detail in a separate article as setting up custom view deserves more context. Next, head over to the Nib file and select the File Owner’s in Document Outline placeholders.
And select Identity Inspector. Alternatively, you can select Identity Inspector from menu by going to View – Inspectors – Show Identity Inspector. Type in RequestCameraAuthorizationView in Class in Custom Class section.

Next, select Connections Inspector and connect contentView outlet to root view.
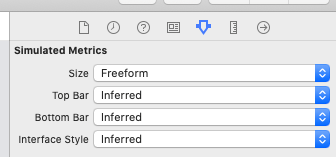
Select view from Document Outline and open up Attributes Inspector and select Freeform size.
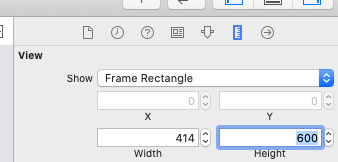
And select Size Inspector and enter in height of 600.
We will, then, add views from Library
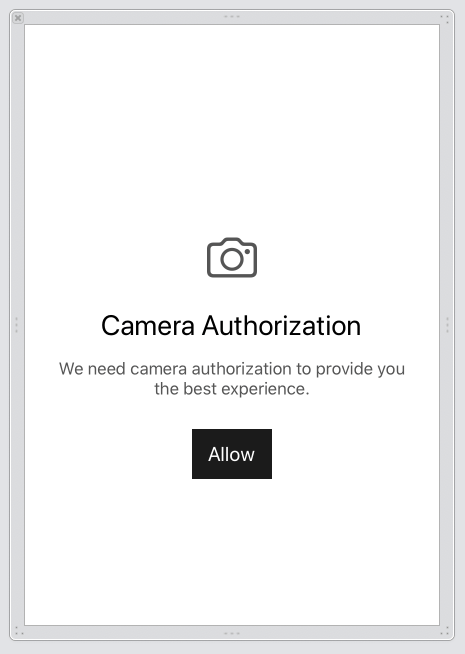
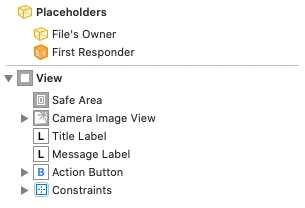
We are adding an UIImageView, 2 UILabel and 1 UIButton. The result should look like this:
I like to setup custom labels for all views by selecting a view and going to Identity Inspector and enter label
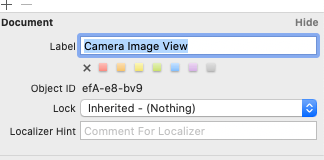
With all the labels specified, you should end up with:
Let us connect views to IBOutlets by going to RequestCameraAuthorizationView swift file and enter following
And heading to Nib file and selecting File’s Owner and Connections Inspector
We will also setup touch action event for the Action Button. Head to swift file again and setup view delegate to inform implementing class about the action button tap event. After setting up, code should look like this:
Connect the IBAction with button in Nib file
Our view is ready and we are going to embed it in LaunchViewController.
4-Embed Request Camera Authorization View
Open up LaunchViewController and add view code. You should end up with:
Build and run the app and you shall see the embedded view.
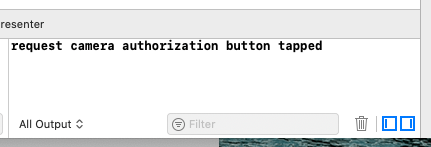
Tapping on Allow button fires a print statement in Console area of Debug area.
Now we can write actual code to request camera authorization.
5-Create Request Camera Authorization Controller
Create a separate group called Controllers and a within the Controllers group, create group called RequestAuthorization. Further, create Camera group inside RequestAuthorization group. You shall end up having:
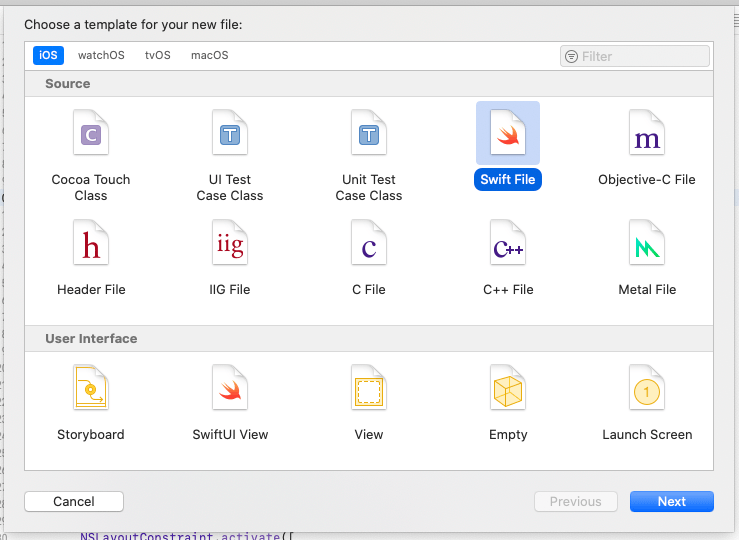
Click on Camera group and select File – New File and select Swift for our Controller file.
Click Next and enter RequestCameraAuthorizationController.swift file and hit Create button. Requesting Camera permission can simply be done by invoking following code:
And following code returns camera authorization status:
Putting both methods together can give us following code:
6-Request Camera Authorization
We can finally call camera authorization by going to LaunchViewController and creating following method:
And replace the print statement in Action Button Tapped method:
This gives us following complete code for LaunchViewController
Build and run app once more and this time hit the Allow button and boom, you get a crash.

This is because we need to present a message to our users that we are requesting camera authorization.
7-Add Camera Authorization Message
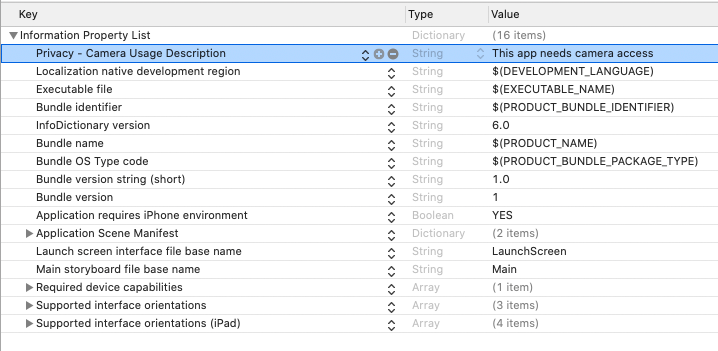
Head to Info.plist file and create a new entry with Privacy-Camera Usage Description and enter your message. Once you are done, your file should look like below:
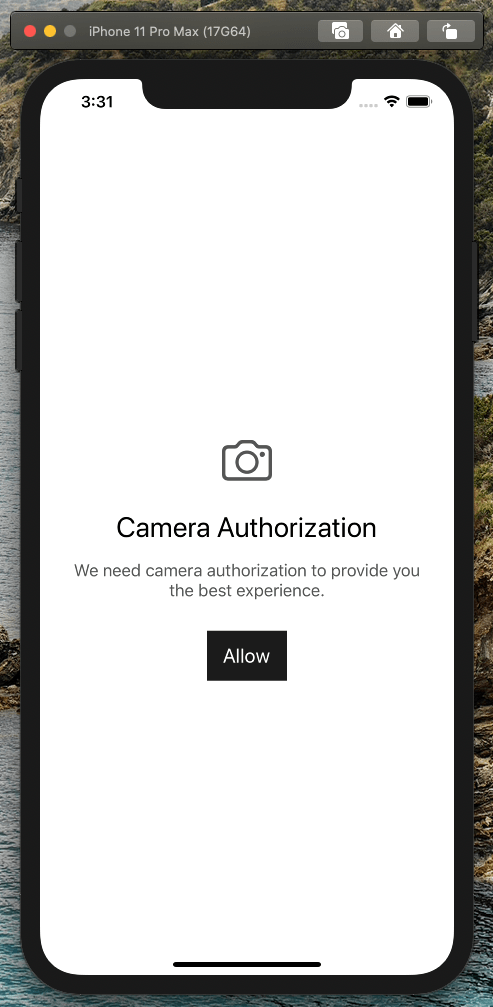
Build and run your app one more time and hit the Allow button and you should see the Permission dialog pop up.
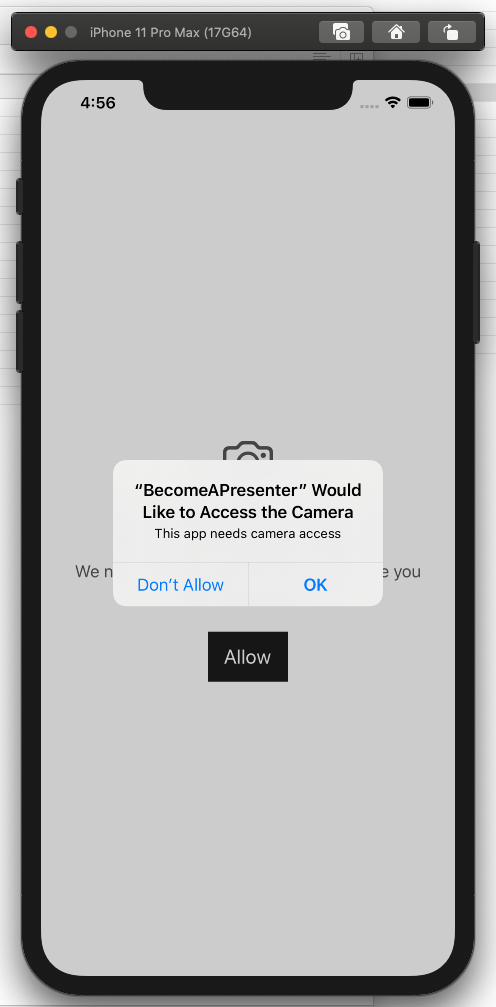
Tapping OK should get you granted message printed in Console window of your Debug area.
8-Source Code
This wraps up our part 1 of Creating Video Capture Application with AVFoundation series. You can download source code of part 1 here.
We will continue the app-building excitement in other parts.

Leave a comment